Method feeder fishing for carp

The method feeder, one of the simplest yet effective methods for catching carp quickly, hence why its so popular among match fishermen.
A method feeder rig is very easy to set-up and use and if you use it right at a well-stocked fishery, you can be assured you’ll have lots of bites. Shown below is a basic method-feeder rig, this is what nearly every single angler at a commercial fishery will be using:
- Some ground-bait or pellets squeezed around the feeder (we’ll go through how to do this correctly later on in the article)
- Banded hook-link
- Pellet or wafter as a hook-bait

This setup fine and the starting point for some great method feeder setups, but the problem is everyone is using the same technique, this means your in the same boat as everyone else on the lake and your success will be more reliant on excellent rig placement and the location where your fishing rather than your rig. The bottom line is this rig will catch lots of fish, but you want just that extra edge to be a few steps in front of everyone, then you’ll have used a little more effort for a big reward.
Getting the right mix:
Groundbait along with micro-pellets are the two most popular substances to squeeze around a method feeder. Nearly every angler on a commercial lake will be using ground-bait because its so effective, however for beginners, it can be easy to get wrong.
In order to achieve the perfect consistency, it’s crucial to get the balance of liquid and dry ground-bait right otherwise you’ll either end up with a sloppy, gooey mess or crumbly, gritty sand. The best way to describe the consistency it being able to squeeze it into a ball with it remaining in shape but still being able to crumble it back into dust by rubbing it in-between your hands.
In order to make the perfect groundbait mix you’ll need:
- Groundbait (We recommend this super carp method mix on Amazon, great for targeting bigger carp)
- Lake water
- Riddle
- 2 mixing buckets

Step 1: Pour you’re groundbait-into a large dry bucket (for demonstration purposes we’re using a smaller bucket)

Step 2: Carefully mix the ground-bait vigorously while adding water slowly to the mix (You can alternatively use a goo/liquid flavouring instead of groundbait for extra flavour)

Step 3: Once you have achieved the right consistency, it is time to pass your groundbait through a riddle, by doing this your groundbait will be free of any big lumps which causes a slower breakdown when underwater. Place a riddle on top of your other bucket which does not contain the groundbait. Then pour the groundbait onto your riddle and start rubbing it through into the other bucket.

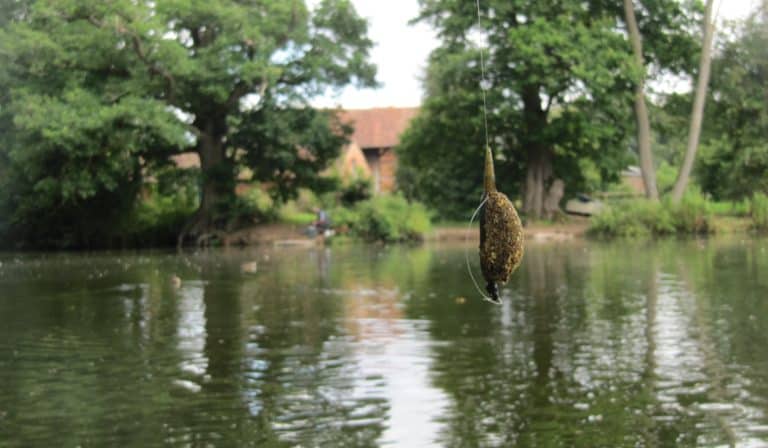
Your groundbait is now ready to use! To mould round the method feeder, you’ll need a method feeder mould. To use it, just pour your groundbait into the mould until full and then ribs side down, press the feeder into the mix and push the release button on your mould. Your groundbait should then emerge as a neatly packed oval.
Micro-pellets
For pellets, the wetting process is dead simple and difficult to get wrong. Just let the pellets soak up water in the pellet wetter for a couple minutes or so (take them our earlier if you want to add goo as it gives extra moisture) and let them dry for 5 or 6 minutes and they’ll be ready to use
Micro pellets are harder to mess up and the preparation for them is dead simple. A lot of people ask which is better, groundbait or micro-pellets and the answer always is, it depends. It depends on what the fish are feeling like that day.
Our advice would be taking a trial and error approach and don’t go fishing without both of them in your tackle-box. In some cases, the most effective mix will be a blend of the two which was particularly effective for us last summer. All you need to prepare pellets is a wetting bag which is you can find here (click to check current price on Amazon)
Step 1: Pour your pellets into a wetting bag
Step 2: Next fill up the container that came with your wetting bag with water
Step 3: Place your wetting bag into the container of water and let it soak for a couple minutes (soak time depends on the size of the pellets, if they are bigger then they will take longer)
Step 4: Once a few minutes have passed, then lift the pellets out and shake off any excess water
Step 5: Leave the pellets to dry for 5 minutes and they should be ready to us
How to produce groundbait quickl
If you got a big match coming up and your going to be fishing for several hours, it may be worth considering using a whisk to mix your groundbait. All you have to do is follow the basic groundbait mixing guide but instead of using your hands to mix up the groundbait use a whisk.
Although this technique is great for producing large amounts of groundbait very quickly, it not preferable for beginners. Getting the feel of the groundbait is much easier when you mix the groundbait by hand. When you use a whisk to mix your groundbait, it is much easier to get wrong and often beginners struggle with this method. However, it is very good for increasing efficiency, for competitive anglers, we’d recommend using this method.
The method feeder rig:
To construct a method feeder rig you’ll need the following equipment:
- Scissors
- A method feeder and mould
- Bait band hook-links
- Wafters/pellets
- A quick change bead

Step 1: Thread your inline method feeder onto your mainline and fasten it using a quick change bead, if you don’t know how to tie a on a quick change bead, check out this tutorial on how to tie a blood knot, this is the knot you use to attach a quick change bead to your mainline https://www.youtube.com/watch?v=QPFtY1EknSU

Step 2: Next slip the loop on the hook-link onto the quick change bead and then either pop a wafter or a pellet into the rubber ring. Pellets are a good alternative to wafters, in clearer waters, the coloured wafters tend to do better than the pellets but neither of them are strictly better than the other.

Step 3: Next place your hook in the bottom of your method mould, you can leave it out but we prefer this method as the hook-bait is therefore nearer to the pile of groundbait

Step 4: lightly pack the groundbait in the feeder until its full, don’t cram as much as possible and press too hard because that will increase the breakdown time of the groundbait

Step 5: Press your feeder into the groundbait quite firmly, this ensures that the groundbait grips onto the ribs of the method feeder

Step 6: Flip your mould over and press the release button, the feeder should then come out of the mould in a nicely packed oval shape. Your feeder is now ready to use!

Location, location, location
It’s surprising how many anglers can’t be bothered to find a good swim, if you’re going to be fishing all day, it’s worth getting this right. Yet many fishermen just go plonk themselves at the nearest swim from the car park.
We usually take a couple laps around the lake looking for any signs of carp, this may sound tedious and tiring but it’s worth effort. It you can locate the fish, you’re sure to have an action-packed session!
We use polarised sunglasses when looking for the carp, they make all the shadows much more visible and the fish much easier to spot, we’d defiantly recommend a pair for anyone started out carp fishing.
Keep a close eye
One the great things about method feeder fishing is that you don’t have to set the hook like you do in float fishing for example. The carp pretty much sets the hook itself and then you just have to pick up the rod and start playing the fish.
Once you’ve cast, set your rod down in a rod rest (You can get one here on Amazon) then make sure that the back-wind is turned off, it’s usually found at the back of the reel.
Next turn your spool anti-clockwise until the end of the rod is just curved in the direction of your method lead as shown below.
Then wait for a bite, you’ll know when because the rod will rip to the side and you’ll need to pick up the rod and start playing the fish
Fox polarised sunglasses (check the current price on Amazon)
The tackle
Method feeder tackle isn’t all that expensive, the mostly costly thing will probably end up being your groundbait. The reel we use for our method feeder fishing is the MAP ACS 4000 FS, It’s a light, strong, well equipped reel, perfect for the job.
We’ve used many feeder rods over the years and there’s lots we would recommend, to see our picks on the feeder rods, check out article, best feeder rods.
One thing we learned the harsh way was cheaping out on fishing gear isn’t the way to save money when fishing, investing in good quality stuff that will last you years is better than buying cheap garbage you’ll have to keep replacing every year, so a good rod and reel is money well spent.
Hookbaits: Goo!
As we mentioned before, nearly every angler on a commercial lake will be using the same setup we’ve showed above because it works great. Wafters and pellets will be the staple hookbait in most cases and we use them same but just add a slight twist to them in order to gain an advantage.
For instance, if we’re fishing a lake where the fish are more cautious and easily spooked, we’ll use washed out wafters to target the elusive and often larger fish in the lake. But if we’re fishing a heavily stocked lake, we might spike our hookbait with some goo to make our bait the most attractive. Essentially, we change the bait depending on the situation and you shouldn’t ever be too reliant on a single bait as you never know what is going to be the carp’s preference.
Shhhhhh – Quiet!
A lot of anglers will tell you to say really quiet when fishing otherwise the fish may get spooked, and most the time this is true, carp can get spooked very easily and in most scenarios you should stay quiet. However, with feeder fishing in commercial lakes, the rule is quite the opposite.
A great technique for getting a quick bite is tapping the end on your rod once you’ve cast and put your rod down. This is because the fish in these lakes are used to being fed by humans and the vibrations attract them as they think its feeding time.
Re-Casting
With method feeder fishing, you want to get bites quickly and often, don’t sit around for ages with your lead in the water. If you don’t have bite in 5-10 minutes, re-cast with a new pile of bait. Also, just because an area doesn’t produce a fish the first-time round, doesn’t mean you won’t catch from there. Keep casting at the same spot for a few times because you’ll have built a heap of groundbait in that area and more than likely attracted the fish. However, if there is repeatedly no success, change swim and re-adjust your tactics.
For the Big’uns
If your targeting specimen sized carp, this same setup will just work fine, just be sure to beef all your tackle and use one the bait-up method feeders instead. Also, when targeting big carp with the method feeder you want to leave the feeder in the water for much longer as the bait ball around the feeder is much larger and therefore will take a longer time to disintegrate into a crumb.
The method feeder doesn’t always work for specimen carp fishing, at large expansive waters, it will be useless like a PVA bag because all the groundbait will just be washed away before the fish get to it. However, at well-stocked lakes, where feeding is competitive, the method feeder works great.
This video demonstrates how to use the bait up method feeder https://www.youtube.com/watch?v=U9hIR3ATQpA
If you want to know more about targeting the biggest fish in a lake, check our other article on how to catch big carp.
Clipping up
Islands and bank edges are well known for being prolific producers of fish, anyone fishing a method feeder should know how to clip up a reel and why its so important. The line clip on a reel helps you to get the perfect distance when you cast each time and its very easy and simple to use:
Step 1: Cast with an empty feeder lead without the hook-link attached (this prevents catching on the banks in-case you overcast) about a meter or so shy of the bank
Step 2: Open the bail arm on your reel and take off little more line so that when you re-cast you’ll be nearer to the bank and then clip up
Step 3: Reel your method lead back in and cast at the same spot, make sure your rod is arced in the air so that you can hit the clip
Step 4: repeat this process until you have the perfect distance to the bank (make sure not to get too close with the empty lead because the groundbait and pellets give some extra weight and therefore will propel slightly further.