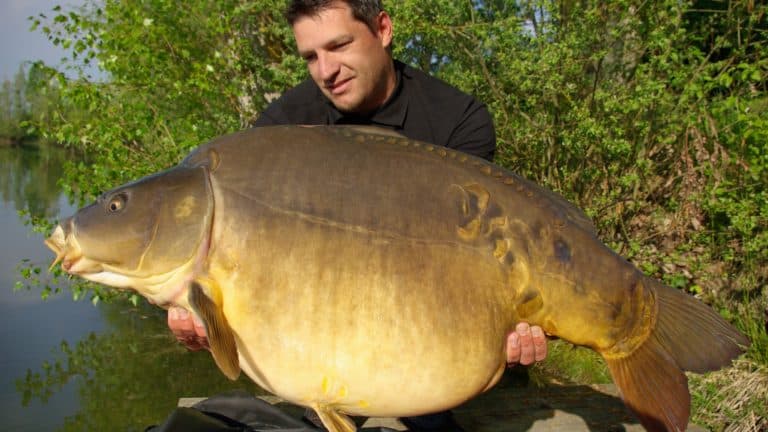
Best Carp Fishing Rigs 2023: With Diagrams

Rigs are arguably one of the most complex aspects of carp fishing, there are so many different systems to fit various situations that to someone who isn’t familiar with carp fishing, rigs can feel daunting and off-putting.
However, they aren’t anything to be afraid of, and with some practice, you’ll have a diverse set of rigs that can cover nearly any fishing situation you’ll run into.
The trick with rigs is to not over-complicate things, there’s no use in learning loads of knots and rigs that you can barely remember, so start with a few simple rigs and keep practicing with them, and perfecting them until you are confident, and then move onto the next if you feel it will bring value to fishing.
These are some of favourite rigs for carp fishing, some of these are more advanced than others but they are all extremely effective in their own way.
Our favorite rigs:
- Ronnie Rig/Spinner Rig
- Snowman Rig
- Zig-Rig
- Inline-Lead Rig
- Method Feeder Rig
- PVA Rig
- Pop-Up Rig
- Control Float Rig
Ronnie Rig/Spinner Rig

Tackle Required:
- Crimps
- Kickers
- Stiff hooklink material
- Hooks
- Hook beads
- Rig swivel
- Spinner swivel
The Ronnie Rig is notorious for its incredible hooking capabilities, its basically a low-lying pop-up rig that is perfect for lakes with not too much weed. The hooking potential on this rig is just savage, its always arced which makes it ready to hook the fish from any angle. This 360-degree hooking angle means that if fish hoovers this rig up, there’s a very good chance its staying in there.
In light weed, there aren’t many rigs that perform better, it hovers just above the lake-bed and will fly into the carp’s mouth when they are rummaging around. The hook-up to land ratio is also amazing on the Ronnie rig, once the hook is set, it won’t come loose easily. If you are going to be fishing particularly weedy lakes, we’d recommend using a chod rig instead but for light weed and silt, the Ronnie rig is arguably the most efficient rig you can use.
The Ronnie rig overall is a very versatile rig, its wide range of use and reliability is what has made it such a big favorite among carp anglers. For instance, if you’re fishing a lake with a silty bottom, it would be advisable to ensure that the hook link is supple and won’t be held up awkwardly which could lead to poor rig presentation. This adaptability is what makes it so useful, its by no means the simplest rig to tie, and mastering it does take some time but it is an incredibly useful rig to have in your arsenal.
The key to a Ronnie/Spinner rig is the pop-up that you use, the hook-bait is another variable in the Ronnie rig which can be changed to fit whatever kind of circumstance you’re fishing in. In the colder months and early spring, we’ll usually use something really vibrant and pungent however in the peak of summer, we’ll use washed-out pop-ups and less vibrant baits. The bait we use for any rig though is chosen through a multi-varied analysis, its based on a variety of factors, so don’t confine yourself to a certain type of bait just because its not orthodox.
In terms of setup, the Ronnie rig does take some practice but once you get hang of it, its just as easy as any other rig.
Chod Rig

Tackle Required:
- Chod filament
- Chod hooks
- Putty
- Chod swivel
- Baitfloss
- Rig ring
Like most anglers, the chod rig is by far our favourite rig for the summer and autumn. This is because, during the summer, plants get more sunshine and are therefore able to grow at a substantially faster rate compared to other seasons. This results in higher levels of weed on the lakebed which can be a difficult problem to overcome. The same problem persists when you’re fishing in autumn since all the plants and trees shed their leaves into the lake, and the lake gets coated with a thick layer of debris which can be difficult to fish over. For example, when fishing with a simple in-line rig during these seasons, you’re almost certain to encounter snags and tangles that are inevitable due to the structure of rig and this is where the chod rig really comes into play.
Unlike your typical rig, the lead on the chod comes after the hook while the hooklink moves freely between a couple of stop beads. This is what enables anglers to be fished in deep weed.
With a chod rig, you can pretty much cast in any direction at any area of the lake and you know for a fact that your rig is well presented well regardless of if it lands in weed or silt. This is why it is such a valuable rig to have in your arsenal as it can literally fit any situation.
When fishing a chod, your hookbait must be buoyant, we’ve seen a few people use drilled-out tiger nuts stuffed with cork but pop-ups are used with the chod rig most commonly and are what we generally recommend.
Another big advantage of the chod rig is that you don’t have to make multiple casts to find that little exposed area of the lakebed which means you can get fishing much quicker!
In terms of complexity, the chod is fairly simple, we wouldn’t go as far as to say its easy to tie because it definitely does take some practice but once you understand the fundamentals of the rig you can modify it to better suit various fishing situations. This is why for beginners we recommend using pre-made chod rigs (Check current price on Amazon).
Snow-man Rig

Tackle Required:
- Coated braid
- Mini pop-ups
The snowman rig is a really simple but effective rig, it essentially is the same as the standard hair rig but has two separate hook baits on the hair which are merged into one. One is a standard boilie and the other is a small pop-up, the boilie is the first bait that is threaded on the hair and is larger than the pop-up. Therefore once the pop-up is threaded on top of the boilie the rig resembles a snowman shape, hence the name.
By having the pop-up on top of the boilie, the snowman rig is very slightly buoyant. This means that the rig behaves similar to a wafter, it just slightly hovers above the lakebed and negates any weight that is on the hook. This means that the hook will fly into the carp’s mouth with little to no resistance.
Tying a snowman is very easy, there are no complicated knots and it is very similar to a standard hair rig in terms of its structure. The main aspect where it differs is in the buoyancy of the hookbait.
Step 1: Cut off around 8 inches of your chosen hooklink material
Step 2: Tie a small loop at the end of your line using an overhand knot
Step 3: Thread on your and remember to leave extra space for the hair since 2 hookbaits will be threaded on before whipping a knotless knot around the hook
Step 4: Using a baiting needle, thread on a larger boilie first and then a smaller pop-up before securing the baits to a boilie stop.
Zig Rig

Tackle Required:
- Zig floater hooklink
- Zig bugs
- Zig foam
- Pop-ups
Its easy to tell from a carp’s features and structure that the fish is designed to be a bottom feeder. They have large mouths with are slightly directed downwards and are perfect for hoovering up bait on the lakebed. Due to this many anglers are under the impression that carp only feed on the bottom which couldn’t be further from the truth. We can’t count the number of carp we’ve caught higher up in the water!
Although carp generally speaking will feed on the bottom, they will definitely change levels in the water, especially during the summer when the water warms up and suddenly your bottom baits that were getting you loads of bites just a few months ago are dead and your blanking each session. This is where a zig rig comes into play, the zig rig allows you to just how low or high up in the water your hook bait is which means you can target carp regardless of what level they are feeding at.
There are lots of baits that you can use with a zig, some people like o use boilies but we find that with tricky carp, the best bait is either an artificial water bug or just a piece of black zig foam. This bait looks much more natural and although carp aren’t natural hunters, they won’t be able to resist a juicy bug floating right in front of them!
The zig rig is most effective during the warmer months because the heat brings the carp off the bottom of the lake and its a very good way of catching carp. If its a very hot day though, our favourite approach is free-line stalking, this is one of the most active forms of carp fishing and it can be really tough but once you’ve got the hang of it, it’ll be the most fun carp fishing you’ve ever had!
Inline-lead Rig

Tackle required:
- In-line lead
- Coated braid
- Quick change swivel
An Inline rig is a simple and easy rig to tie, its perfect when fishing hard bottom lakes where there isn’t much weed. We found that when using this rig in weed or deep silt our hook-link would get tangled and result in poor rig presentation. Whenever you’re fishing in lakes with lots of weeds we recommend using something like a chod-rig which keeps the rig well presented regardless of where it lands.
However, this is in only one instance, and on lakes with hard bottoms, the Inline rig is very effective. We find inline-rigs most useful when we’re fishing small waters or just heading to the bank for a few hours and we just want to get a couple of bites and head home.
What makes the inline rig perfect for these quick sessions is that is really easy to set up and you don’t need lots of fancy equipment to tie it. It literally takes 5 minutes to tie from start to finish!
Step 1: Thread on some anti-tangle tubing onto your mainline, this not only keeps your rigs well presented on the lake-bed but it also provides protection for the fish in case it tries to roll on the line. Sometimes when fish do this, they can get hurt because the fishing line is quite sharp and abrasive.
Step 2: Next thread a tail rubber and you inline-lead onto the mainline
Step 3: Tie on a quick change swivel using a blood knot onto the end of your mainline and push the lead down onto the swivel so that they are flush
Step 5: Tie an overhand knot in your hook link and use a knotless knot to tie on a hook
Step 6: Thread on your bait of choice and then connect the hook link to a quick change swivel
Method Feeder Rig

Tackle required:
- Method feeder
- Quick change swivel
- Method feeder mix
The method feeder is often associated with match fisherman and commercial fisheries but the method feeder can also be used to fish for specimen carp if you make a few adjustments. First of all, you want to use the largest method feeder that you can find, one that is at least 35 grams. This is because on specimen waters, the fish are spread over a much larger area and the lakes tend to be bigger so there’s no point in casting a few pinches of ground-bait as it will have little to no effect. A bait-up method feeder is a good option if you want to use the method feeder for specimen carp fishing.
We like to use ground bait when fishing the method feeder and pack it tightly around the method feeder. By packing it around the method feeder tightly, the ground bait will disintegrate slower and therefore stay effective for a longer period of time. Its also good practice to really load on ground bait when fishing for specimen carp again due to the size of the lake and the amount of fish.
The method feeder isn’t always the best option when carp fishing, it works well on lakes where there is a high stock of fish and you can, therefore, achieve competitive feeding. But in lakes where fish are far and few the method feeder becomes obsolete because its key feature of presenting the ground bait and hook bait together is no longer present because by the time a fish even finds your rig, the groundbait is likely to have washed away. However, on commercial fisheries, the method feeder can be absolutely devastating, if you want to learn all the tips and tactics for using the method feeder, take a quick look at our new course on method feeder fishing.
The method-feeder rig also doesn’t work on rivers for the same reason, the flow of the current will wash the ground bait away fairly quickly and you’ll be fishing with no bait in your swim. When fishing in rivers, its better to bait up your swim with something more substantial so that the fish will remain in your swim instead of following the bait downstream.
One of the best features of the method feeder is how easy it is to tie, it requires few knots and is very easy to learn for beginners:
Step 1: Take your main line and thread on your method feeder
Step 2: Tie on a quick-change swivel and pull the line so that the swivel is flush with the method feeder
Step 3: For your hook link, tie an overhand knot on one end and a knotless knot on the other end, we usually keep our hook links at around 6 inches
Step 4: Thread the loop from the hook-link onto the swivel
Step 5: Using a baiting needle, thread on your bait of choice
PVA rig

Tackle Required:
- Mesh PVA bags
- Solid PVA bag
- Long baiting needle
PVA, more formally known as polyvinyl alcohol is a substance that dissolves in water and therefore is perfect for temporarily holding bait. PVA bags allow you to present a neat little pile of bait around your hookbait which increases the attraction in your swim and can often lead to a quick bite. This is why we favour PVA bags when we’re fishing small waters for short sessions because if you throw a PVA bag into a swim that has already been heavily pre-baited, it loses all-purpose and becomes futile. Fishing PVA bags on very large waters is also often pointless because since the time between bites is so long, the PVA mix will probably have been washed away before the carp can get to it.
So in essence, the PVA rig is similar to a method feeder rig, it provides a small amount of bait around your hookbait which attracts fish.
There are also two ways of PVA can be used, there is mesh PVA and solid PVA bags. The main difference between the two is the disintegration time, solid bags will take much longer to dissolve and will also tend to produce a tighter area of bait around your swim. So really you choose which version of the PVA bag to use based on how quickly you want it to break down and remain in your swim.
PVA bags can hold a wide variety of baits as well, pellets and crushed boilies are the most widely used baits inside PVA bags but you can use pretty much anything inside them as long as the mixture isn’t wet because then it will start to cause the PVA bag to dissolve before it hits the water.
PVA bags can be fishing with loads of different rigs but we most commonly use it with either a lead clip system or an in-line lead setup. A PVA rig is very easy to tie and usually requires minimal modification to your rig.
Pop-up Rig

Tackle Required:
- Coated braid
- Split shots
Pop-ups are essentially a buoyant boilie which is why they are such popular baits and are used in many rigs. There are so many options and different ways that you can use pop-ups as we mentioned before in chod rig, Ronnie rig, and more. But the point is, they are incredibly versatile baits that can be used in multiple forms but these rigs can often seem and become complicated quickly. This is a much simpler, cleaner way of using a pop-up and in lots of scenarios can be just as effective.
We tend to use a pop-up rig when we’re fishing over moderate weed or silt, is the lakebed is really rough then we’ll use a chod because the hooklink can move freely but for mild weed, this rig works just fine.
Aside from the buoyancy, the other major difference that you’ll find between a boilie and a pop-up is the colour of the bait. Boilies tend to be darker, natural colours like maroons and browns whereas pop-ups are usually very vibrant and fluorescent which makes sense because of how the two baits are used.
Boilies are bottom baits are can be used as both a hookbait and loose feed, either crushed up or whole. Boilies are designed to blend in with the feed and not look suspicious or alarming to the fish, this is why many anglers choose to go even a step further and use washed-out boilies to target tricky carp who are weary of anglers. Pop-ups on the other hand, take a completely different approach. They hover just above the lakebed which ensures they are presented well on surfaces where boilies may be covered like weed and silt. They are also super bright and visible and often have pungent smells, the idea behind this is to create an incredibly attractive bait for the carp that is so irresistible, that they are forced into hoovering it up.
Step 1: Cut off around 8 inches of stiff coated braid hooklink and strip back a couple of inches from the end
Step 2: Tie a small loop in the striped end using an overhand knot
Step 3: Thread on your hook and whip it down using a knotless knot
Step 4: Tie another small loop in the other end of the hooklink
Step 5: 2 inches down from the hook, strip off a centimeter of coating, and squeeze on a split shot
Bolt machine Rig

Tackle Required:
- Controller float
- Zig floater hooklink
- Petroleum jelly
We’re not the biggest fans of this rig but that is only due to the context in which it is used but it is undoubtedly a very useful rig to have in your arsenal. A controller float is used when you want to catch carp on the surface but they are out of range, our recommendation is that if you can reach the fish without the control float, you should.
Free-lining for us anyway has just been a much more effective way of catching carp on the surface, when free-lining, you’re more in control and can have direct contact with the surface which makes striking much easier whereas with a controller float the experience is slightly dulled. By no means does this make it a boring way of fishing, it’s still incredibly exciting but just not quite as good as free-lining. If you want to learn more about catching carp on the surface, check out our article How to stalk carp.
The other drawback of using a control float when fishing rather than free-lining is that the controller float is quite big and bulky which could potentially spook the carp, this is why the hooklink for a control float should be around 1.5 meters.
The advantages, however, can sometimes far outweigh these issues, if the carp are inaccessible via free-lining and they are consistently feeding on the surface, then the bolt machine rig is a very good option.
Typical bait for this rig would be a pellet or small pop-up. We often use bread but that is when we have the option to free-line as it stays on the hook for a short period of time and requires constant re-casting. Another tip is rubbing the hooklink with some petroleum jelly, this makes the hooklink spread and prevents tangles which result in a better presentation.
There you have it, all of favourite rigs which cover nearly every fishing situation. For someone who’s new to carp fishing, this might all seem a bit daunting and complicated but as we mentioned at the beginning, don’t overwhelm yourself and try to learn everything. Just start with one or two simple rigs like the method feeder rig or in-line rig and slowly try new things when the fishing situation is appropriate.
For us knots where the toughest part of fishing, they seemed so intricate, precise and very hard. We spent ages looking and learning useless knots and over-complicating everything, in reality you only really need to know a handful of rigs in order to have accessibility to a wide range of rigs. These are our top 5 essential knots:
Basic knots
| Knotless knot |
| Overhand knot |
| Grinner knots |
| Blood knot |
| Palomar knot |
Knotless knot
The knotless knot is one of the easiest knots to learn, it is literally only used when attaching a hook to some line and is a key component of carp fishing. This is arguably the most common knot and is essential to know.
Grinner knot
The Grinner Knot is another popular and strong knot used in carp fishing. In terms of difficulty, it is moderate and is often used to tie lines to swivels, etc.
Overhand loop knot
The overhand loop knot is another really simple but essential knot. It lets you put a loop at the end of some line that has many uses. For example, if you want to attach your hooklink to a quick swivel or if you want to tie a hair-rig. There are a million use cases for this knot so its definitely one worth learning.
Palomar knot
The palomar knot is a very popular knot for attaching a line to a hook in lots of different forms of fishing. In carp fishing though, the palomar knot is used most often when attaching the line to swivels. Its a very strong and secure knot and is great for tying with a braid.
Blood knot
The blood knot is a very easy-to-learn knot, its commonly used in carp fishing and is primarily used to connect the line to a swivel or quick change bead.